
The very first thing you should do before you start making an amigurumi is have a look at the whole pattern. Check that you understand every abbreviation and you know how to make every stitch. When I read Toothless' pattern I wasn't sure I could do the wings, so this was the first thing I did before going on crocheting the little dragon. It is quite easy once you understand the pattern. I will talk about my mistakes so maybe it can help. If you are a beginner, consider doing a couple of amigurumi before this one, as working in black is really hard, you should already know how to "subconsciously" find the next loop, etc.
This is the picture of the finished wing:

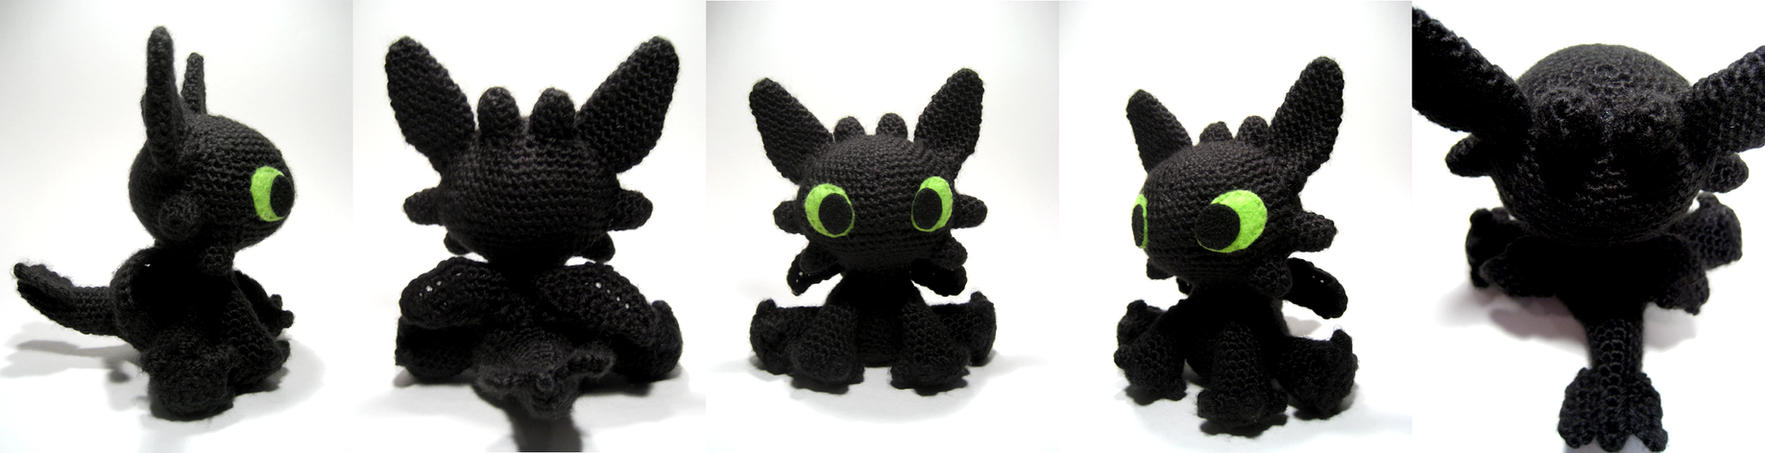
And this is the first wing I tried (on top, unfinished, you will read later on what happened) compared with the final piece:

On with the tips for the wings!!!
ch=chain
st=stitch
inc=increase
sc=single crochet
I have rewritten the instructions just for the sake of making it similar to the rest of the instructions given on "sarselgurumi" page.
Examples:
3sc=means make one sc in each of the following 3 stitches.
ch6= make six chains.
1st row.-
ch6, sc in second st from hook and the one after it (second chain from hook means
basically that you dont sc in the very last chain you made, if you do this part
well then you should have 7 stitches when you finish as indicated), double inc in
next ch (make 3 sc in only one stitch, basically increase by 2), sc 1 in each of the next 2 chs; ch1 and turn (the ch1 is basically so that you have the same number of stitches when you turn it to begin next row, if you don't do the chain you will lose that stitch when you turn) (7 sc) (when it says turn, think of a mirror, don't put it upside down)

 |
| This explains where is the second loop to start crocheting |
2nd row.- 3sc, double increase(remember, this means 3sc in one st), 3sc; ch1 and turn (the ch1 is basically so that you have the same
number of stitches when you turn it to begin next row, if you don't do the chain you will lose that stitch when you turn) (9 sc)
3rd row.- 4sc, double inct, 4sc; ch4 and turn (same as
before, you are doing 4 chains but in the next row you won't be working on the last one but the following 3, doing this part well is important). (11 sc) In the picture I have circled the 4 chains so you can see them, they are really important as they start the tip of the wings.

4th row.-
sc in 2nd ch from hook and next 2 chs (same as the beginning of first row) , 5sc, double inc, 5sc, 3 foundation sc (I did 3slip stitches and it gave the wings the round look you can see on the left, it looks quite nice). (19 sc) ch 1, and
turn.
5th (last
row).- 9sc, double inc, 9sc; fasten off (21 sc)
TIPS: I
didn't do all the loop of a stitch but only the FRONT LOOP so that the wings do not have an
inner and outer part. This way, when you do the second wing and turn it left, they will look the same.
This wings
are the very first non-circular design I crocheted so I can assure you it really
isn't difficult.
When it
says "turn", DO NOT turn it upside down like I did first time, you
will end up with a wannabe-circular pattern and that is not what we want. Flip it like a mirror.
Hope it helps. I will be updating this while I keep doing more toothless' parts, so let me know if you have any doubts in the comments section (I can also speak Spanish or show you how to read English patterns).
Thank you a lot!!!! Very good tutorial for the wings! Found your comment on Sarselgurumis blog and followed the link! Now my Toothless is soon ready to take off ��
ReplyDelete/Angelica
I am glad it was useful :) I will keep posting about the Toothless pattern (I didn't personally like the tail fins so I'm changing them). I've had a break making him because I'm crocheting something quick for my cousins this Christmas, which I will also post here as I've had to remake the whole pattern.
Deletehola la verdad muy util el patron, me quedo algo parecido aunque hay algunas cosas q no estiendo como 2 caps; 3 pb fundación que es fundacion?. y te queria preguntar si tenes algun patron en español de la cola, porque nose como hacerla. muchas gracias
ReplyDeleteHola Caro, gracias por el comentario.
DeleteComo verás en paréntesis, yo hice slip stich (punto deslizado) cuando dice foundation. Esos 3 puntos son los que les dan la forma redondeada a la parte izquierda del ala que subí. Aun así, voy a resubir la foto con los 3 puntos que comentas marcados en rojo para que los puedas ver bien.
Lo de "2caps" no sé que es, ¿dónde lo has visto?
Respecto a la cola, voy a hacerla esta tarde a ver si me sale bien siguiendo el tutorial. Si veo que no hay nada extraño, lo que haré será subir un tutorial para que aprendas a leer los patrones en inglés, pues una vez te explique ya verás que es muy sencillo :)
mil gracias por la respuesta tan rapido, y veo q dejaste la cola asi q estoy inmensamente agradecida. Los "caps" me di cuenta que es en la traduccion que salen se refiere a los "chs" :). Veo que hiciste el amiguri completo asi que aprovecho para preguntarte; en el cuerpo en la vuelta num 9 es ( 12mp. 6 dis. y 18 mp)? o ( 12mp. 6dis. 12 mo y 6 dis)?. La verdad me confude la traduccion cuando dice nalgas, calculo que se refiere a la cola, si es asi seria un solo tramo de disminuciones, si se refiere a los muslos serian 2 tramos pero en ese caso no llegaria a los 30 puntos.
ReplyDeleteNuevamente te agradesco, fue de gran ayuda
yo use estee patron para las alitas de la cola me parecieron un poco mas grande y eso me gusto mas. http://hoshiamigurumi.blogspot.com.es/
ReplyDeleteI just tried the wings. In the 4th row the foundation single crochet stitch adds another pointy part to the wing. Optically that stitch is adding 3 more SC to the row. There are a lot of good videos until now, so i recommend to not go for the round slip stitch like in the picture.
ReplyDelete